1. What is a Critical Error in WordPress?
WordPress’s critical error is an error that prevents it from loading all the scripts it requires to function properly.

The email provides users with comprehensive insights into the underlying cause of the problem. It outlines errors stemming from malfunctioning plugins or themes, potential database corruption, or inadequate memory resources. Furthermore, it offers detailed information, including the specific line where the error occurred.
Additionally, the email furnishes a recovery link, facilitating access to the site in recovery mode. Users can utilize this link to log into their WordPress dashboard and effectively address the issue at hand.
2. What Causes the “There has been a critical error on this website” Error?
Typically, the error arises due to a malfunctioning plugin, script, or code, disrupting the smooth operation of WordPress.
Failure to address this issue could result in WordPress being unable to load essential files.
Another factor contributing to this error is the recent incorporation of code snippets from tutorials onto your site. If these snippets contain incorrect or invalid code for your site, they may prompt a critical error. Additionally, conflicts with other WordPress plugins or custom code could instigate the error.
With that in mind, let’s explore the steps to rectify the critical error in WordPress and restore the functionality of your website.
3. How to Fix the “There has been a critical error on this website” Error?
We will present six rapid solutions to assist you in resolving the “There has been a critical error on this website” issue.
SOLUTION 1: Check Error Logs
First, you can check the error log file that stores PHP error details.
To do so, go to hosting panel > File Manager and navigate to the public_html folder. Look for the error_log file.
The most recent error entry will appear at the bottom of the log, showing the date and time. You can refer to this error log file to pinpoint the cause of your site’s error.
SOLUTION 2: Enable Debug in WordPress
WordPress features a built-in debugging system designed to detect coding errors within the core software, themes, and plugins.
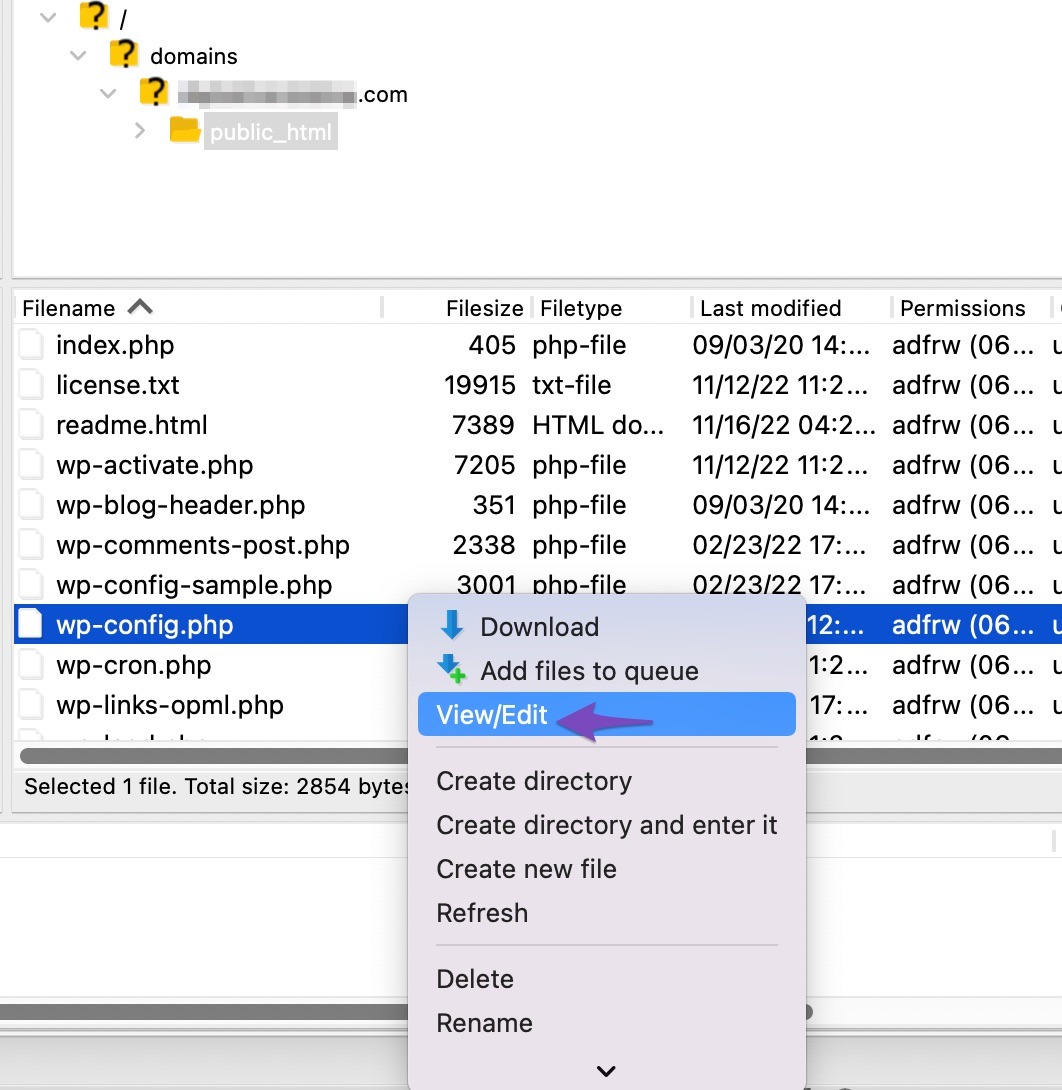
Enabling debug mode allows you to observe various PHP issues occurring on your site and ascertain their underlying causes. To activate WordPress debug mode, access the wp-config.php file located in your public_html directory.
Select “View/Edit wp-config.php file,” as demonstrated below.
Then add the following code lines at the document’s bottom, just before the message /*That’s all, stop editing! Happy publishing.*/ Once done, click on the Save button. Don’t forget to upload the file back to the server.
define( 'WP_DEBUG', true );
define( 'WP_DEBUG_DISPLAY', false );
define( 'WP_DEBUG_LOG', true );

Here’s what it will look like: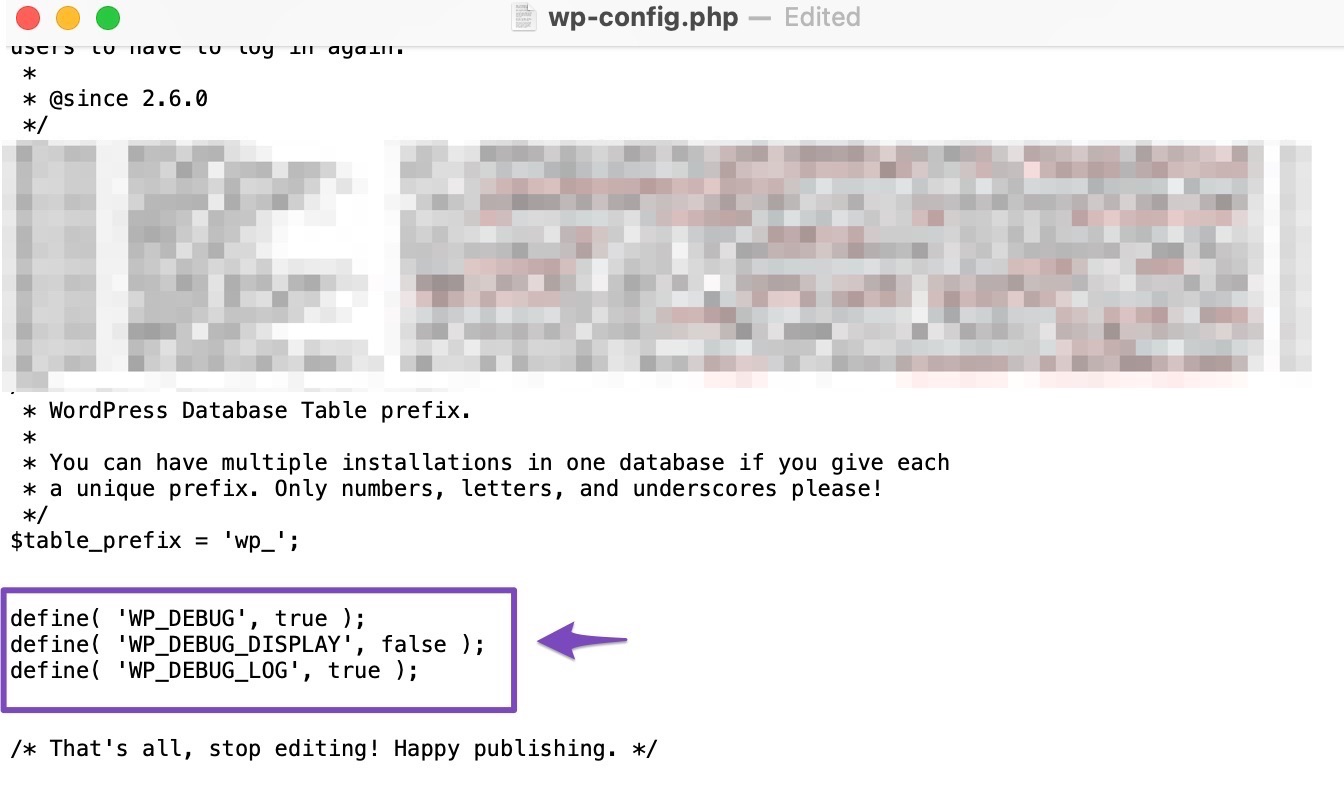
Debugging has been activated on your site, and any errors will be logged. You can find the debug log in the wp-content directory under the name debug.log.
SOLUTION 3: Deactivate All the Plugins
When encountering a critical error, a plugin is often the culprit. Identifying the problematic plugin may seem daunting, especially if your site hosts several or even dozens of them.
However, there’s a straightforward method to pinpoint the issue: disable all plugins and check if the error persists. If the error disappears, re-enable the plugins one by one until the error resurfaces. This process helps identify the problematic plugin.
Access your website via FTP or the File Manager app provided in your WordPress hosting account.
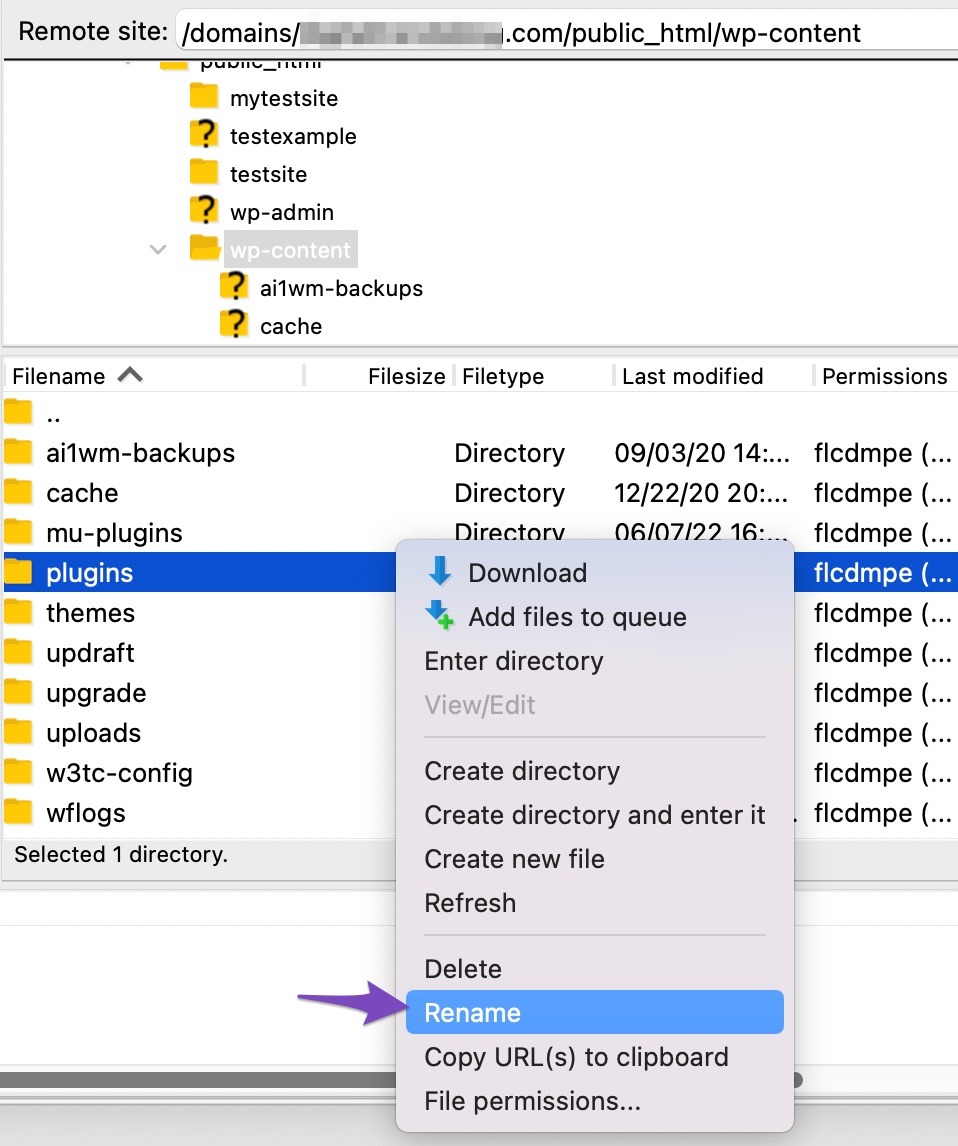
Upon connection, navigate to the /wp-content/ directory. Locate the plugins folder, right-click on it, and choose the Rename option, as demonstrated below.
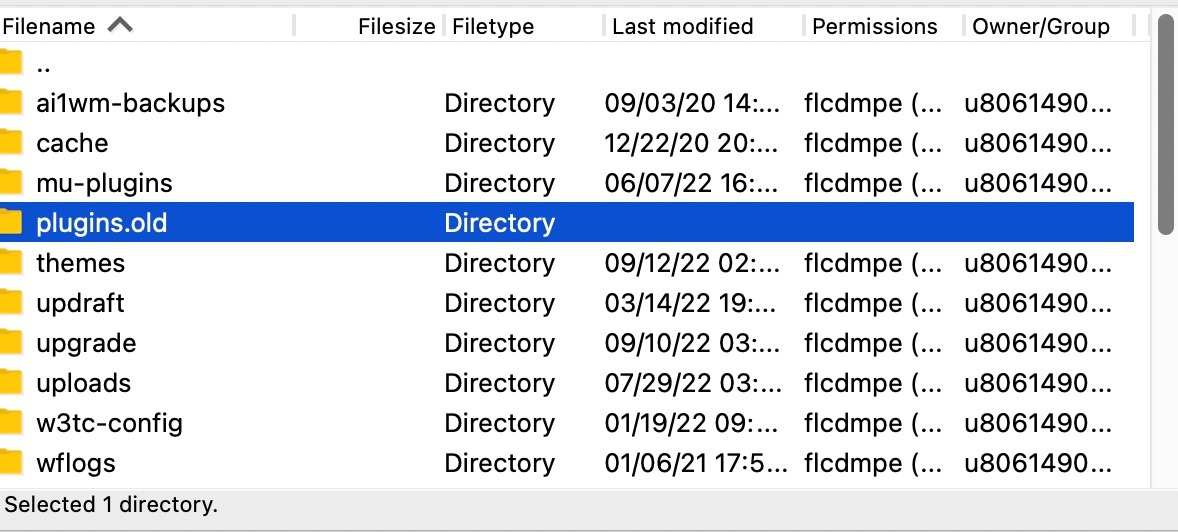
After completing this process, all your plugins will be deactivated.
WordPress scans for the plugins folder to load the active plugins on your website. If it fails to find the plugins folder, it’s unable to activate them, automatically rendering them deactivated.
You can now visit your website to verify if the critical error message has vanished.
NOTE: Whether you’ve resolved the critical error or not, don’t forget to rename the ‘plugins.old’ folder back to ‘plugins.’ WordPress will then recognize the folder, and you can reactivate them one by one from the WordPress dashboard to identify which one caused the critical error.
SOLUTION 4: Raise the PHP Memory Limit
While a plugin or theme may be responsible for your website’s dysfunction, it’s often the PHP memory limit that triggers the “There has been a critical error on this website” message.
What does PHP’s memory limitation entail?
WordPress imposes a stringent restriction on the quantity of RAM (referred to as memory) that a single PHP script can utilize on your web server. When this limit is reached, it results in the occurrence of the critical error or the appearance of the white screen of death.
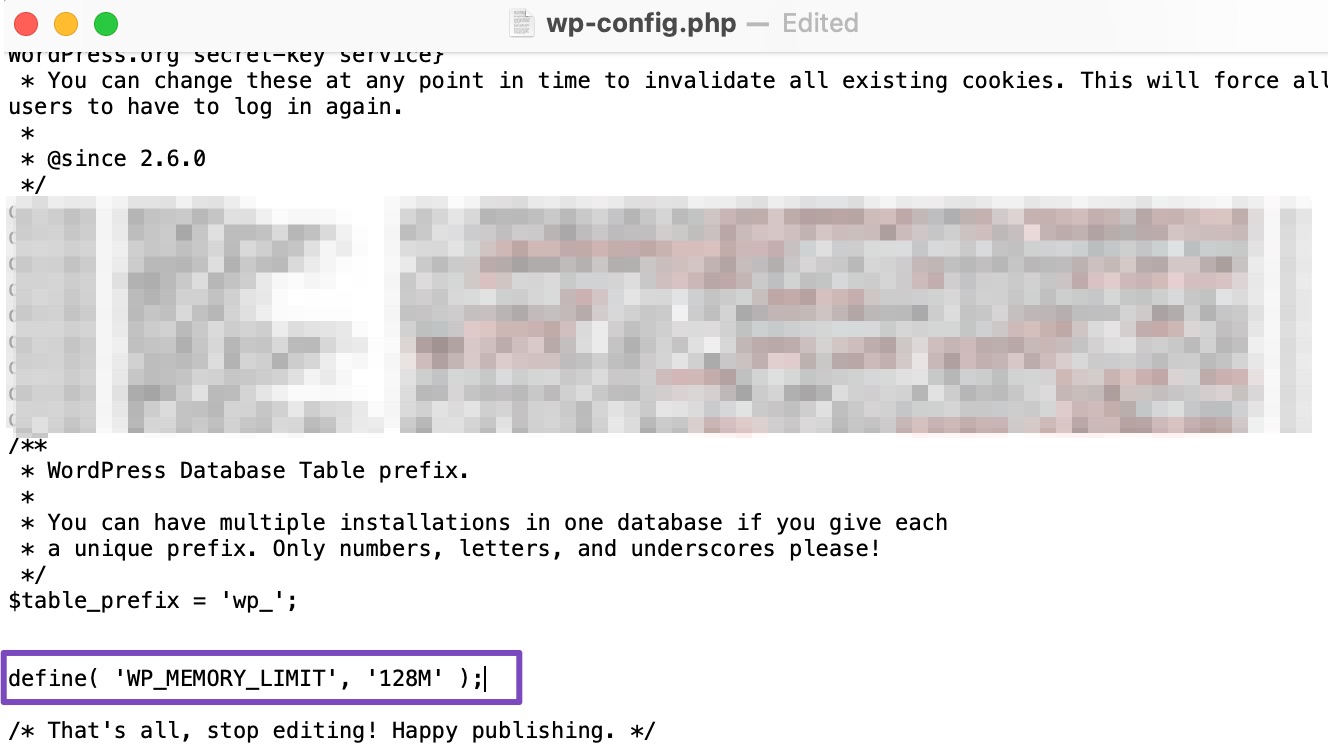
To augment the PHP limit, access your site via FTP or File Manager in hosting control panel and open the wp-config.php file. Insert the provided code snippet before the final line.
define( 'WP_MEMORY_LIMIT', '128M' );

Once you’ve added the code, click on the Save button.
Conclusion:
If you come across the message “There has been a critical error on this website. Please check your site admin email inbox for instructions,” there’s no need to panic.
Thankfully, there are methods to diagnose even the most obscure error messages. Simply review your email inbox and locate a message from WordPress to pinpoint the issue and swiftly address it.
By following a checklist of common solutions, you should be able to resolve the critical error and restore your site’s functionality.
We also advise maintaining regular backups. With a backup readily available, you’ll be able to swiftly restore your site if you encounter a WordPress error message similar to this one.

 Subscribe to my channel